1. 简介

gRPC(全称为gRPC Remote Procedure Call)是一种高性能、开源的远程过程调用(RPC)框架。由Google开发,gRPC基于HTTP/2协议,并使用Protocol Buffers(Protobufs)作为接口描述语言。以下是gRPC的一些关键特性和优势:

  • 高性能:gRPC利用HTTP/2的特性,例如多路复用和二进制协议,提高了传输效率和性能。

  • 多语言支持:gRPC支持多种编程语言,包括C++、Java、Python、Go、Ruby、C#等,使得开发人员可以在不同的编程环境中使用它。

  • 简化开发:通过使用Protobufs,gRPC提供了一种简洁和高效的方式来定义服务接口和消息结构。

  • 双向流:gRPC支持客户端和服务器之间的双向流通信,使得它在需要实时通信的应用场景中表现尤为出色。

  • 负载均衡和命名解析:gRPC内置了负载均衡和命名解析功能,使其更易于在分布式系统中使用。

1.1 主要组成部分

  1. 服务定义:开发者使用Protobufs定义服务和消息。

  2. 客户端和服务器代码生成:gRPC使用Protobufs定义生成相应的客户端和服务器代码。

  3. 传输层:基于HTTP/2协议进行高效的数据传输。

1.2 使用场景

  1. 微服务架构:在微服务架构中,gRPC常被用来实现服务间的高效通信。

  2. 实时通信应用:由于支持双向流,gRPC非常适用于需要实时通信的应用,例如聊天应用、视频流应用等。

  3. 跨语言服务:gRPC的多语言支持使得它非常适合跨语言的服务调用场景。

2. grpc配置

2.1 下载

由于国内环境,grpc下载极其困难的。目前在Gitee上只能找到gRPC依赖的部分”官方”镜像仓库,而网上提供的镜像仓库较旧,所以这里我构造的是v1.34.0版本。通过下面代码,选择一个稳定的分支进行克隆。

1
git clone -b v1.34.0 https://gitee.com/mirrors/grpc-framework.git grpc

选择一个存放grpc项目的文件,按下Shift+鼠标右键,就会弹出如下目录,点击Open Git Bash here

弹出bash终端,输入上述代码:

下载完成后,在你选择的目录下出现一个grpc的文件夹,就表示克隆完成。

2.2 修改文件内容

在克隆下来的grpc文件中,有一个.gitmodules文件,里面存放的是我们需要的grpc子模块的网址,一般方式是访问不了的,所以需要修改成我们能够访问的国内的gitee上仓库的地址。这里直接将下面代码复制去替换.gitmodules文件里面的内容。

1
2
3
4
5
6
7
8
9
10
11
12
13
14
15
16
17
18
19
20
21
22
23
24
25
26
27
28
29
30
31
32
33
34
35
36
37
38
39
40
41
42
43
44
45
46
47
48
49
50
51
52
53
54
55
56
57
58
59
60
61
62
[submodule "third_party/zlib"]
path = third_party/zlib
#url = https://github.com/madler/zlib
url = https://gitee.com/mirrors/zlib.git
# When using CMake to build, the zlib submodule ends up with a
# generated file that makes Git consider the submodule dirty. This
# state can be ignored for day-to-day development on gRPC.
ignore = dirty
[submodule "third_party/protobuf"]
path = third_party/protobuf
#url = https://github.com/google/protobuf.git
url = https://gitee.com/local-grpc/protobuf.git
[submodule "third_party/googletest"]
path = third_party/googletest
#url = https://github.com/google/googletest.git
url = https://gitee.com/local-grpc/googletest.git
[submodule "third_party/benchmark"]
path = third_party/benchmark
#url = https://github.com/google/benchmark
url = https://gitee.com/mirrors/google-benchmark.git
[submodule "third_party/boringssl-with-bazel"]
path = third_party/boringssl-with-bazel
#url = https://github.com/google/boringssl.git
url = https://gitee.com/mirrors/boringssl.git
[submodule "third_party/re2"]
path = third_party/re2
#url = https://github.com/google/re2.git
url = https://gitee.com/local-grpc/re2.git
[submodule "third_party/cares/cares"]
path = third_party/cares/cares
#url = https://github.com/c-ares/c-ares.git
url = https://gitee.com/mirrors/c-ares.git
branch = cares-1_12_0
[submodule "third_party/bloaty"]
path = third_party/bloaty
#url = https://github.com/google/bloaty.git
url = https://gitee.com/local-grpc/bloaty.git
[submodule "third_party/abseil-cpp"]
path = third_party/abseil-cpp
#url = https://github.com/abseil/abseil-cpp.git
url = https://gitee.com/mirrors/abseil-cpp.git
branch = lts_2020_02_25
[submodule "third_party/envoy-api"]
path = third_party/envoy-api
#url = https://github.com/envoyproxy/data-plane-api.git
url = https://gitee.com/local-grpc/data-plane-api.git
[submodule "third_party/googleapis"]
path = third_party/googleapis
#url = https://github.com/googleapis/googleapis.git
url = https://gitee.com/mirrors/googleapis.git
[submodule "third_party/protoc-gen-validate"]
path = third_party/protoc-gen-validate
#url = https://github.com/envoyproxy/protoc-gen-validate.git
url = https://gitee.com/local-grpc/protoc-gen-validate.git
[submodule "third_party/udpa"]
path = third_party/udpa
#url = https://github.com/cncf/udpa.git
url = https://gitee.com/local-grpc/udpa.git
[submodule "third_party/libuv"]
path = third_party/libuv
#url = https://github.com/libuv/libuv.git
url = https://gitee.com/mirrors/libuv.git

然后使用如下指令更新gRPC所有依赖:在grpc目录下点击Open Git Bash here,在弹出的bash终端输入下面指令。

1
git submodule update --init

3. 编译

3.1 创建存放生成的vs项目位置

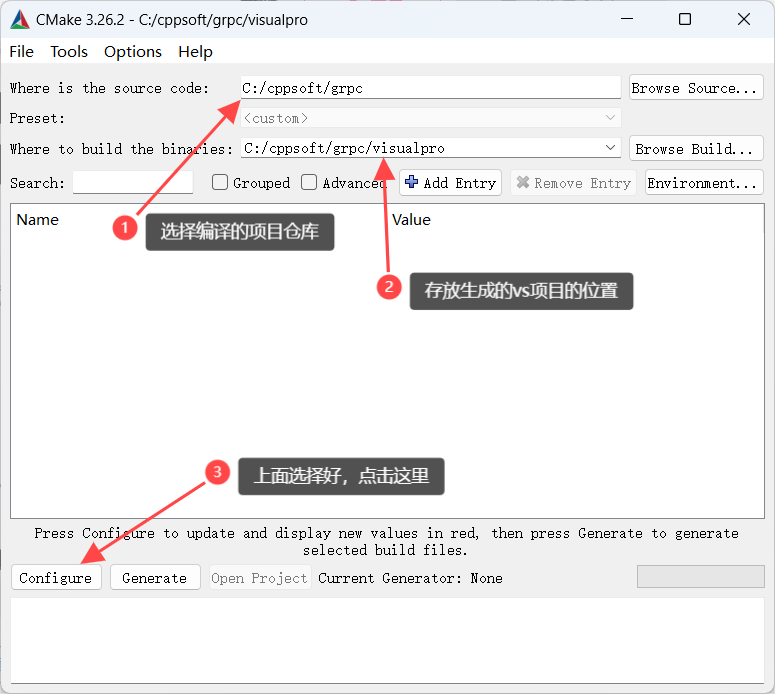
在grpc目录下创建一个visualpro文件夹,用于存放生成的windows所用的项目。

3.2 启动CMake

启动CMake后,会出现下面界面:

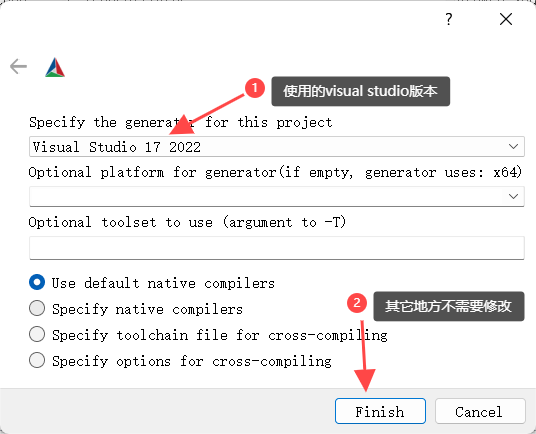
点击Configure后,出现以下界面:

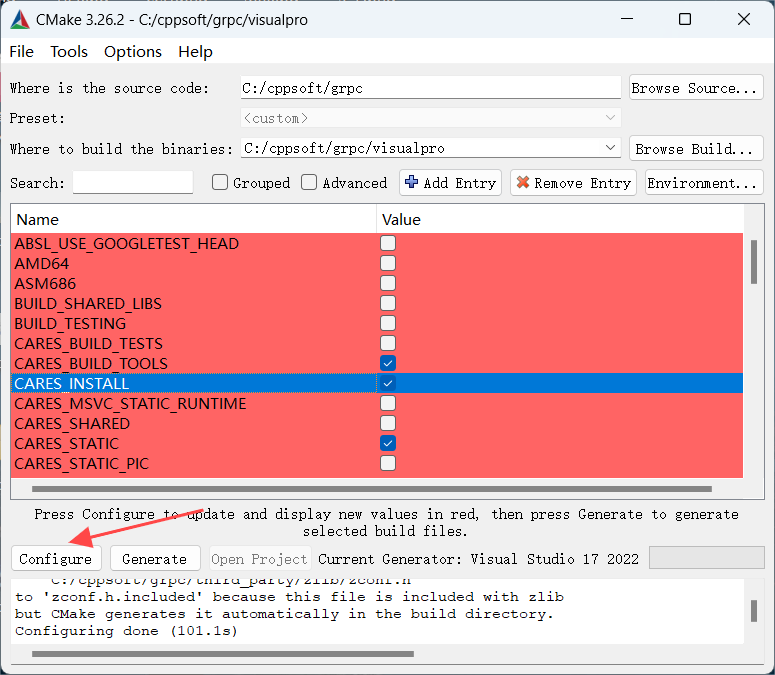
点击Finish后,等待编译,完成后就得到以下界面,不需要修改,直接点击Configure,生成配置。**(到这里可以先完成go和NASM的安装,因为不确定在接下来的grpc编译和生成中会不会需要它们)**

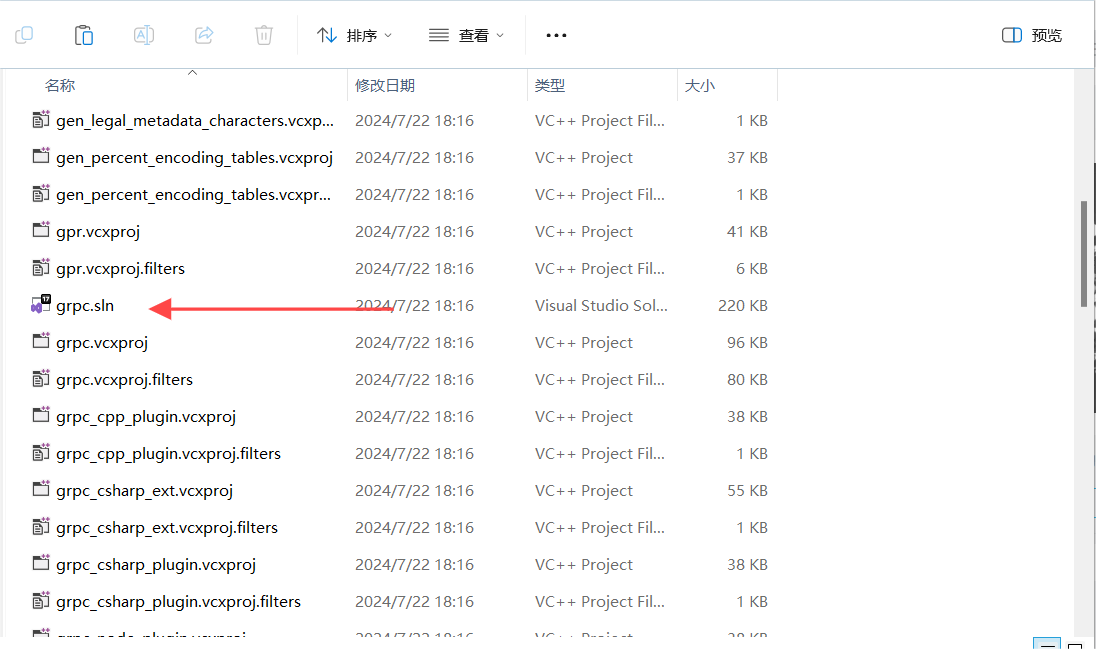
配置完成后,点击Generate直接生成。生成成功后,在visualpro目录下会出现生成的文件:

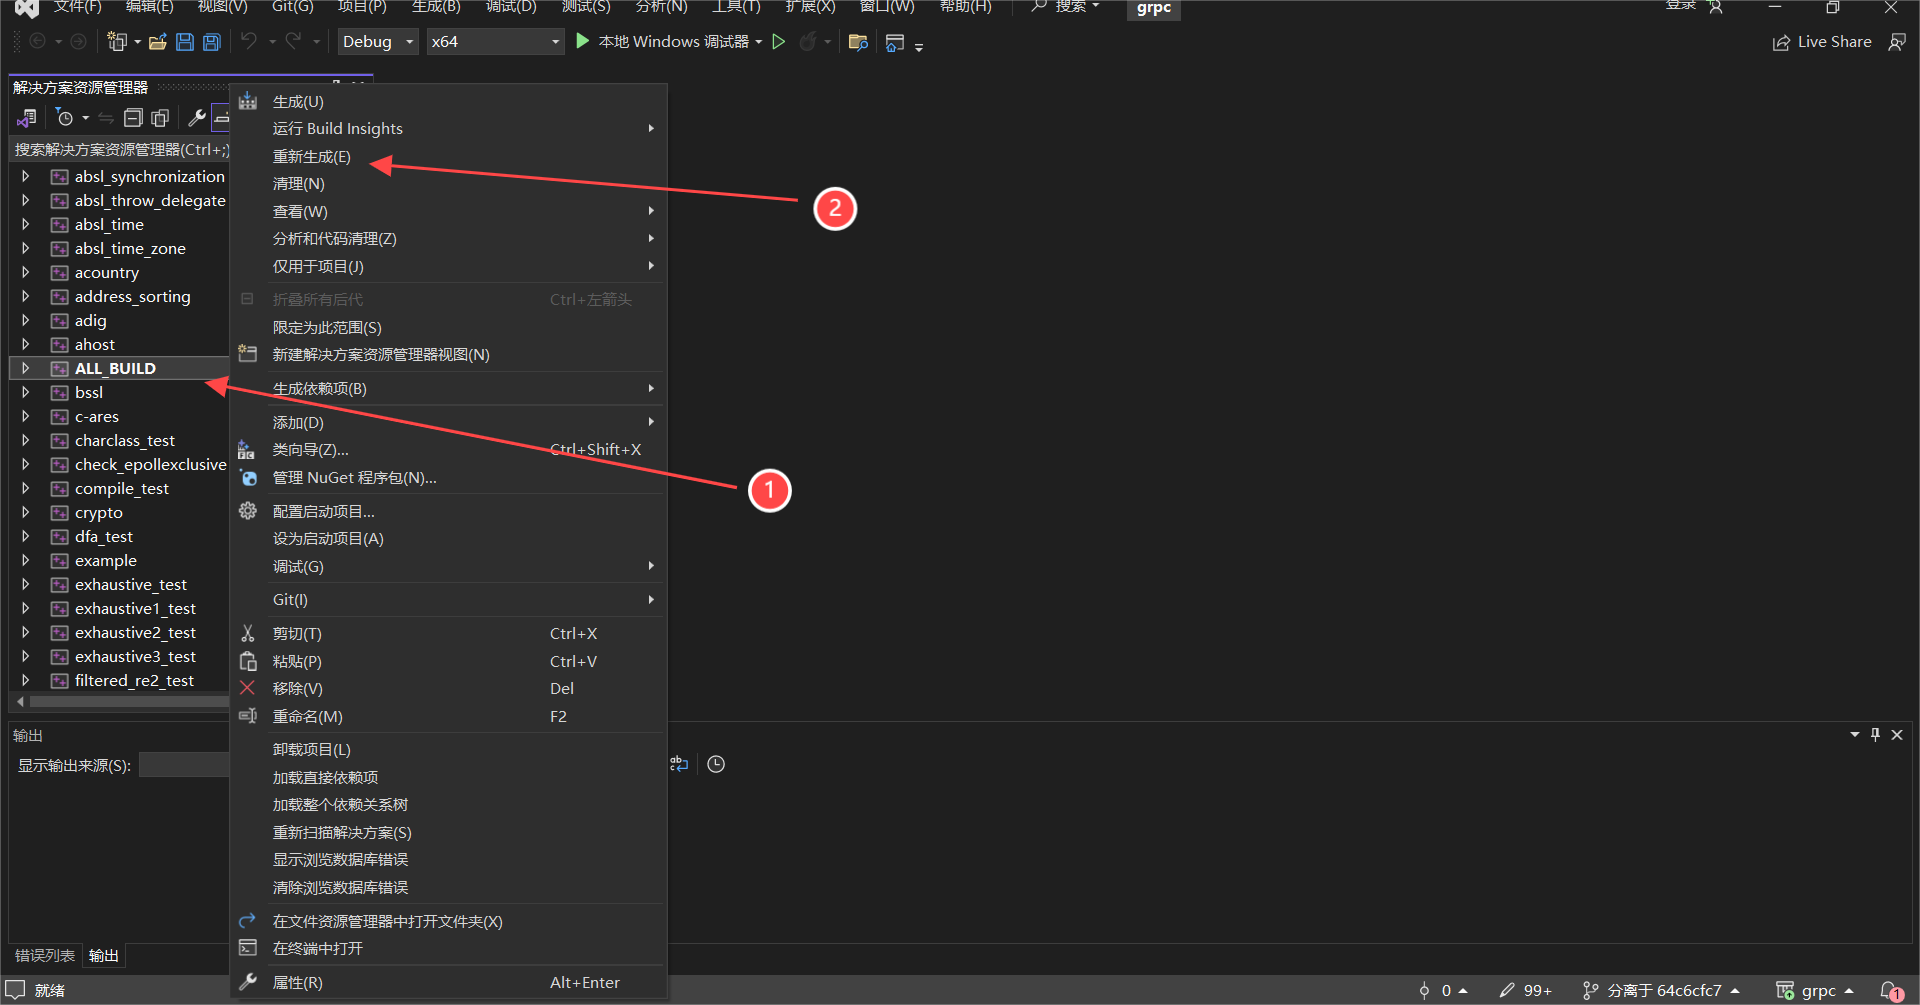
其中grpc.sln是创建的工程的路径,点击打开,出现以下界面,找到ALL_BUILD,右键选择重新生成(时间有点长)。

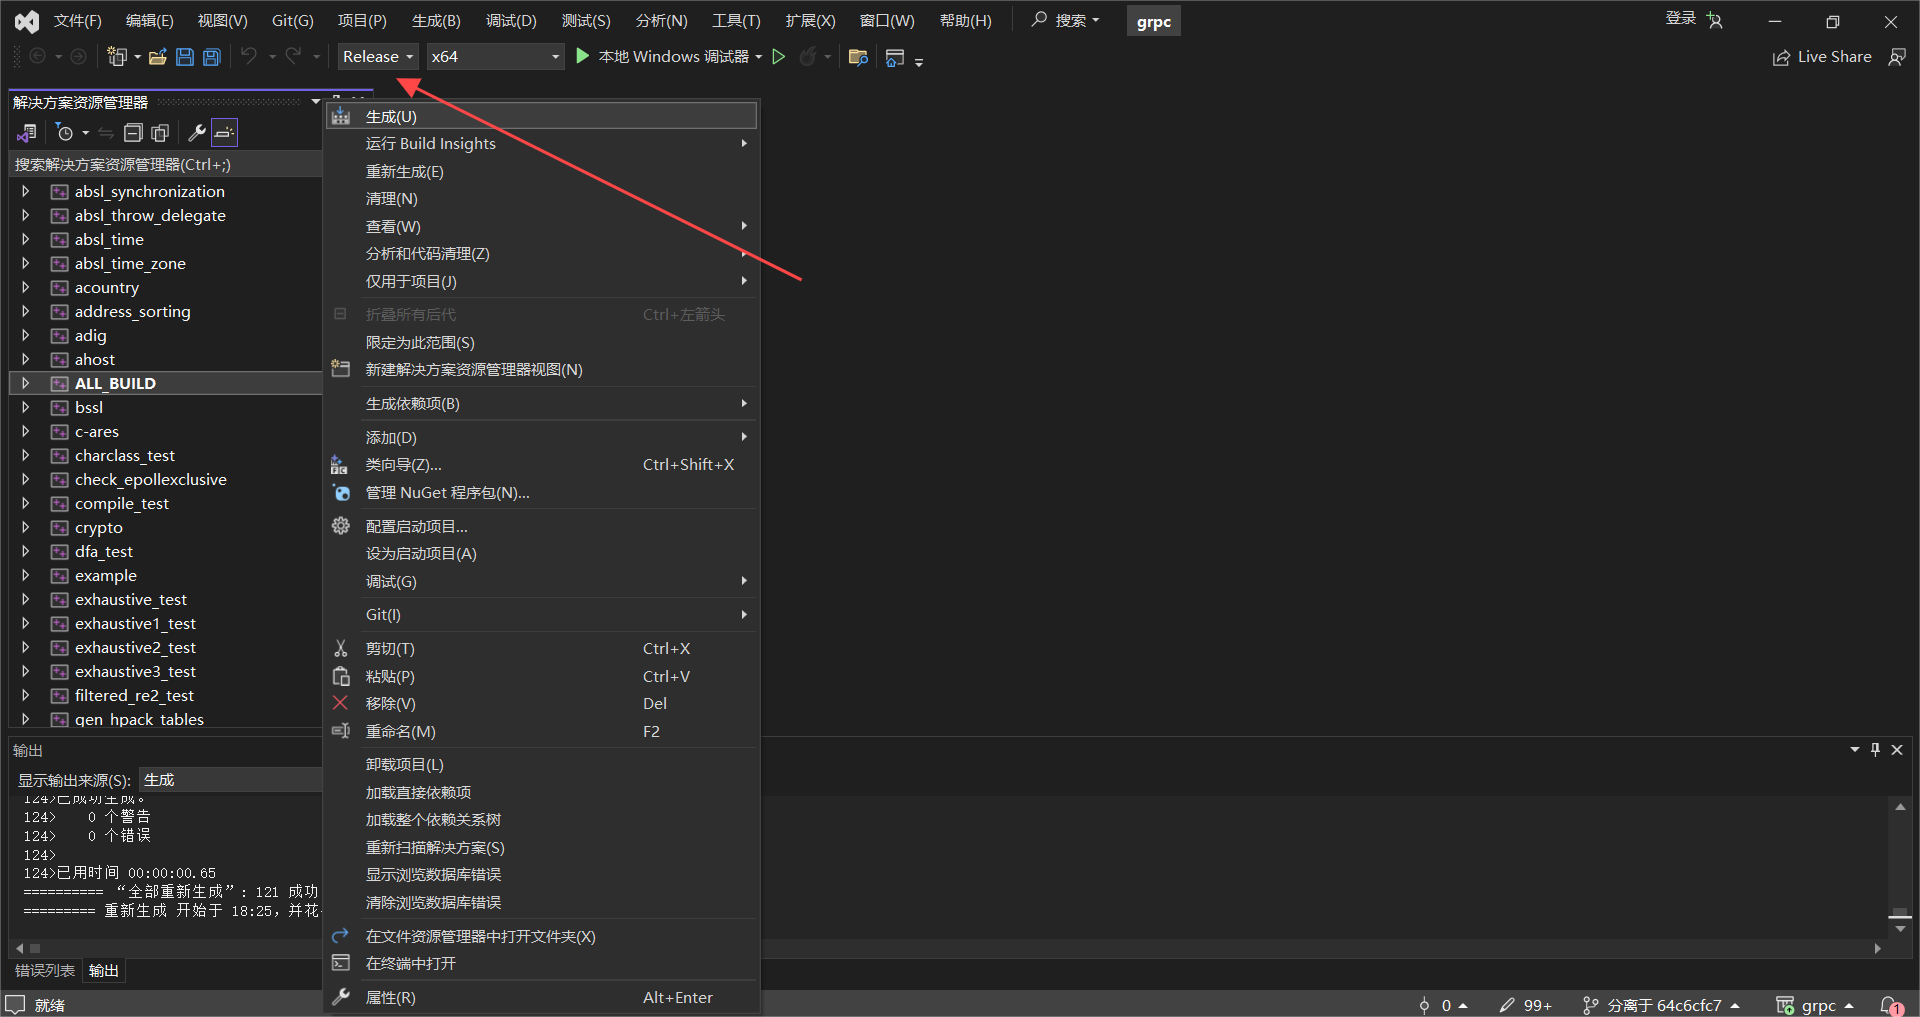
上面生成的是Debug版本,下面在重新生成Release的版本。

当visualpro目录下出现Debug和Release文件时,说明生成完毕!

3.3 下载并配置NASM

编译grpc需要准备nasm,下载网址为https://www.nasm.us/,点击网址后进入NASM官网,点击右上角的DOWNLOAD,选择版本2.16,选择系统Win64,然后下载NASM的可执行文件nasm-2.16-installer-x64.exe,下载好后得到以下可执行文件:

然后点击该可执行文件,安装步骤是一直next即可。

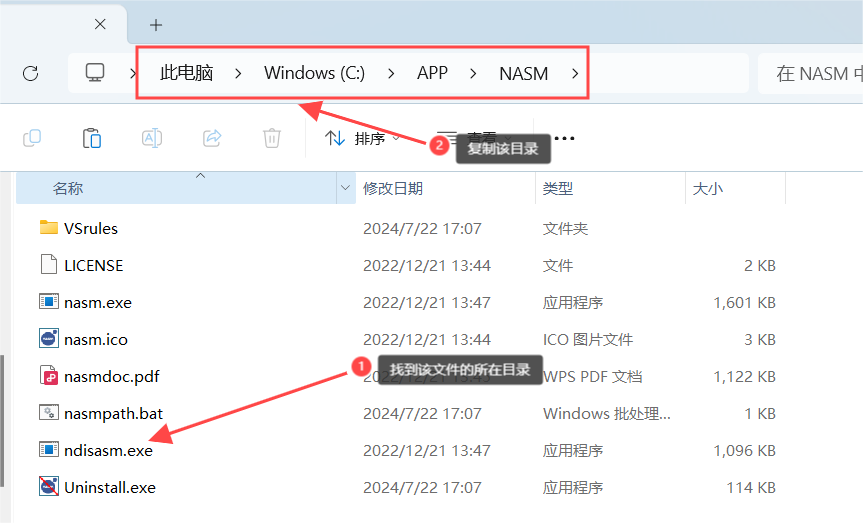
找到刚刚安装的目录,复制该路径。

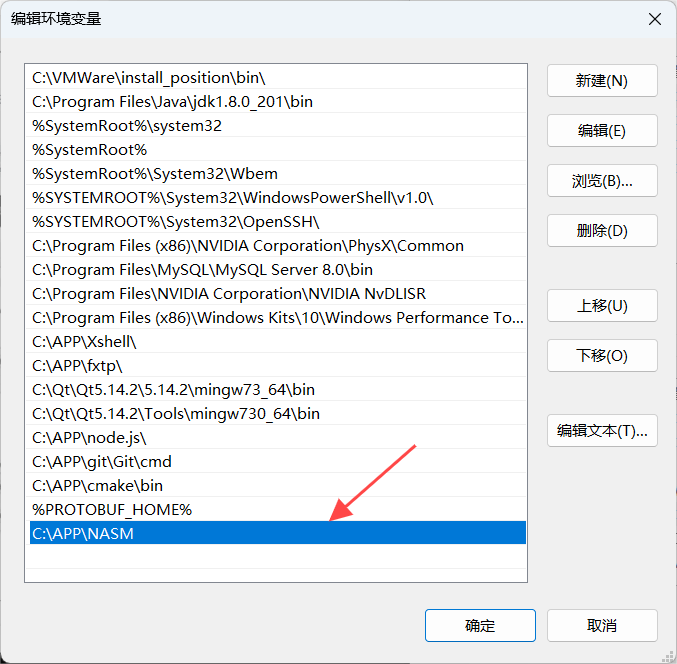
将该路径配置到环境变量:

4. 安装go

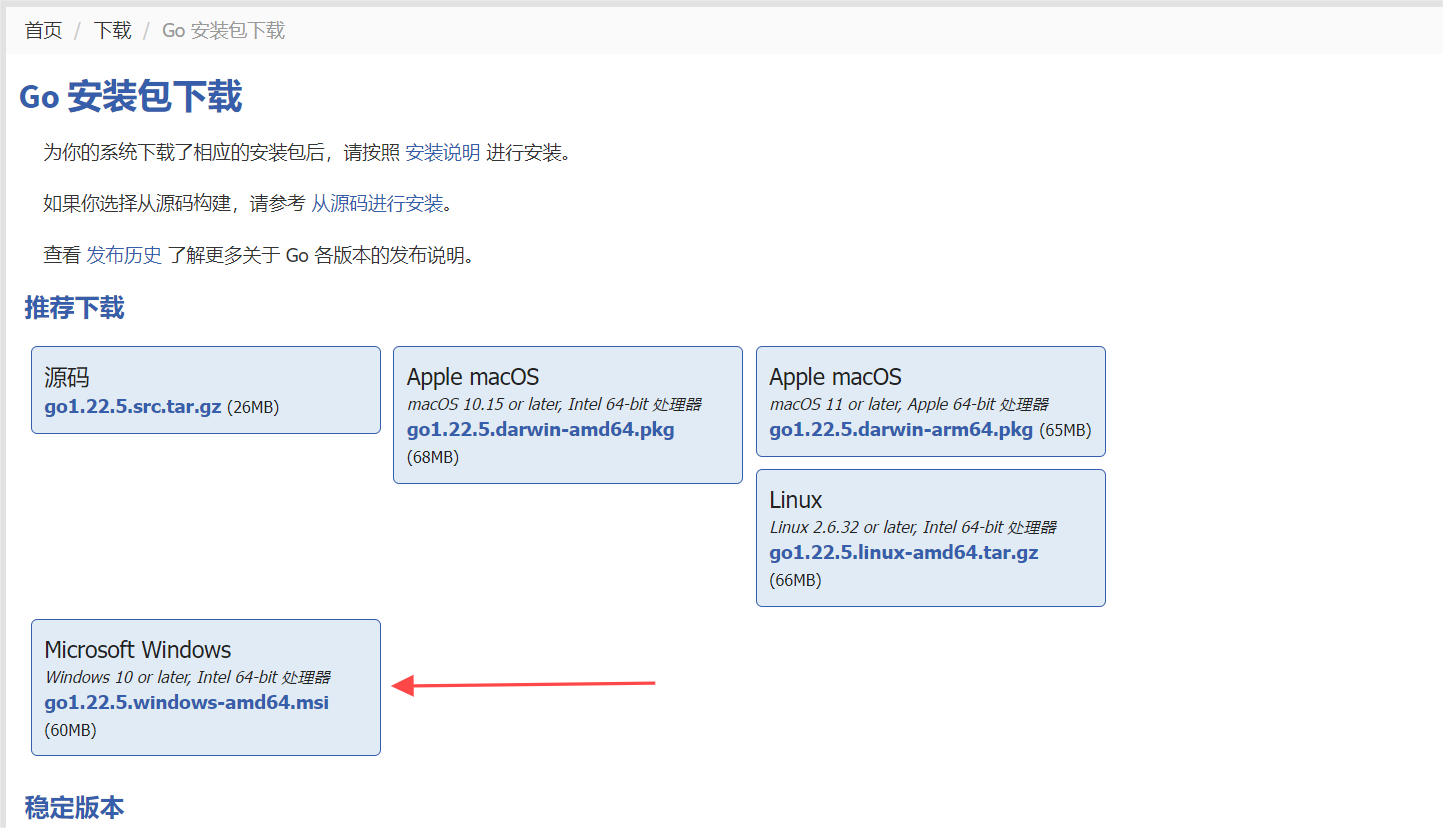
windows环境下下载go,安装地址:https://studygolang.com/dl。根据自己系统下载,什么版本都可

下载好后,进行安装,一直next即可,安装好后go会自动写入我们的环境变量。然后打开终端,执行go version,出现对应的go版本,就表示安装成功。

替换代理,在终端执行以下代码,换成国内网络直连的模式

1
go env -w GOPROXY=https://goproxy.cn,direct